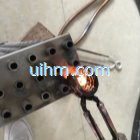
Induction Silver soldering with induction heating
Views Send Enquiry
A full treatise on silver soldering (otherwise known as hard soldering) would be an extensive document, and all I want to cover here is the basics. A serious job such as constructing a model locomotive boiler requires you to master the basic techniques thoroughly before you start otherwise there is a good chance of failure and incurring a considerable cost. Not that there is anything particularly difficult about it, it’s just a question of getting the methodology right and having the confidence that a joint hidden forever will remain sound for the life of the boiler.
Apart from boiler making silver soldering is very useful for fabricating small fittings, doing odd repairs, and making tools. A botched silver soldering job is a real eye-sore so it’s as well to get some practice on scrap bits or non-critical jobs. The main fault that is seen (apart from using insufficient heat) is an excess of solder used on the joint resulting in it flowing all over the work where it is incredibly difficult to remove. The secret of silver soldering is to fulfill the following criteria:
- Close-fitting joint prior to soldering.
- Making sure the work is CLEAN before starting.
- Fluxing the work thoroughly (using the right flux).
- Using the correct amount of heat.
- Using the correct amount of solder (and size of rod) for the job.
- Applying the solder at the correct time and place.
- Controlling the flow of the solder.
There are several grades of silver solder, and some flow more easily than others (it is the silver which provides the free-flowing characteristics). But in no case is silver solder good at gap-filling – this is opposite to that other useful property it has which is to creep into every nook and cranny. Because of this your joint needs to be close – not more than 5 thou preferably – but an interference fit is not only not required it is to be positively avoided. Edges of joints can be usefully chamfered to provide better access for the solder, and joint faces might be scored to encourage flow in a certain direction. Neither of these are really necessary for small fittings though. If it is necessary to fill a larger gap it’s quite simple to jam in fresh cut slivers of copper or brass sheet before soldering, filed flat afterwards and you would never know the gap was there.
It is absolutely essential that the joint faces be quite clean and oil-free to obtain a sound joint. The solder will not flow across nor bind to a dirty or oxidised metal surface. All joint faces should be cleaned with emery and/or wire wool to brighten the metal surface, fresh-machined surfaces are best but if there is oil there it’s best to use a solvent to remove it. Jobs that require more than one soldering operation will need to be pickled in an acid bath to remove traces of old flux before the second part of the job is tackled. Dilute sulphuric acid is still probably the best pickle for brass and copper work, but it is admittedly not the safest. Citric acid and some other proprietary mixtures can also be used but are slower in action and tend to have other drawbacks that sulphuric avoids. Again, for small fittings it’s less of a danger using sulphuric acid as the quantities are small but dunking large hot chunks of metal into sulphuric acid can ruin your day if you’re not careful. Be particularly careful with hollow parts (tubes or items with bores), as these can cause the acid to shoot out in a jet a considerable distance. Always wear eye protection, and cover what bits of skin you would like to keep with rubber gloves and aprons etc.
Different fluxes are recommended for different silver solders, and you should always use the one that matches the grade you are using. Most (if not all) are based on borax (boracic acid being the active ingredient) but the temperature at which they work, and the length of time they will work for once the metal gets hot will vary. Most are sold as a white powder to be mixed with water to a creamy paste for application. Make sure all joint faces are thoroughly coated and dribble some extra along the joints to make a fillet to be sure. The first application of heat should be gentle to vapourise the water leaving the flux intact and in place (the powder would simply have been blown away by the gas jet), then gradually increase the heat until it melts.
The inexperienced will soon discover that you need a surprising amount of heat to make the solder flow correctly, and whilst this is easy to apply to small fittings (say, 3/4″ scale locomotive valve bodies) it’s much more of a problem where larger items are concerned (such as a boiler). For small jobs I use a pair of old refractory radiants from a gas fire (the white things with pimples!), these can be held in the bench vice and the parts rested on them, very little heat will get through to the vice itself. For larger items it’s very useful to have a purpose-built brazing hearth complete with fire bricks as the work can then be insulated to some extent thus retaining the heat where it’s needed. For small jobs a hand-held can of propane (not butane as the calorific value is much lower) with a screw-on burner is adequate. Larger jobs however require some sort of brazing torch with a larger heat output, those made by Sievert are well known and respected and many different sized nozzles are obtainable to suit the job (a variety will be needed for a job like a boiler). Oxy-acetylene or oxy-propane gear is really for the specialist and not really suitable in novice hands for silver soldering, special techniques are needed to manipulate the highly localised heat to prevent burning of both solder and parent metal.
The first sign that you are nearing the required temperature is when the flux turns to a brown sticky goo, it will change from this appearance to a light-amber mobile liquid as the correct temperature is reached and it will seem to crawl all over the surface of the metal. In this state it is able to remove any oxidation from the metal and keep it bright. When you are sure that this temperature has been reached then move the flame away from the work and just touch the silver solder rod to the joint, it should immediately melt and flash around – if it doesn’t then the work is not hot enough. On NO account should you have the silver solder rod poking into the flame whilst you are applying heat, not only is it likely to melt and a blob will fall off and stick just where you don’t want it, but you are likely to end up with an un-sound joint through lack of heat even when it appears to flow. It is the hot work that should melt the solder. This brings us to another point – silver solder is available in different sized rods and it makes sense to use a size appropriate to the job. I find that for small fittings 1 mm wire is wonderful, it is easy to apply small amounts of solder in the precise place it’s needed. Larger work can use sticks up to 2.5 mm or larger. If the joint gap is correct very little solder is required and any excess will do nothing useful and just look ugly. There are times where a solid fillet is needed in boiler work, but you should refer to a book on boiler making to understand where this is applicable. You can also buy ground silver solder and flux as a paste, and this can be applied to joint and simply heated – useful for joints in fittings that would be difficult to reach otherwise. You can do something similar with the fine solder wire if you snip a length off and wrap it round the joint before heating, but if you do this put the solder on first and cover it well with flux, then heat the work indirectly – i.e., don’t blast the flame at the silver solder but to one side of the joint. When it’s hot enough the solder will melt and flow normally.
To take the example of the loco valve body a little further, it might be useful to describe how I make mine. The main part of the body is of some 3/8″ brass rod, and a tee-piece is required to be soldered onto the side at a right angle. The tee is a stub of 1/4″ x 40 threaded brass with a bore to mate with that of the body. My method is to first drill through the side of the body, and follow this with a 1/4″ endmill to make a shallow counter-bore. The stub of 1/4″ threaded brass is then lightly peened with a small hammer at two places 180 degrees apart such that it can be twisted into place in the counter-bore where it will be held firmly without additional help. This is one other problem with silver soldering – how to hold parts together whilst the soldering is completed. It is important that the parts do not move until the solder is set and this can be achieved as described above or with the use of clamps or screws. A little liquid flux would be applied to the joint face before twisting them together, and a fillet of flux run around the outside of the joint. The part can then be heated as described and when at the right temperature the tip of the silver solder wire (I usually quickly grind a point on the end) touched at a point where it won’t show when finally in place. The solder flashes around and a virtually invisible and clean joint results. You might think this is a waste of time, and why not simply prop the two pieces up vertically and get on with the job. The reason is that the method can be used for items like steam turret valves where there are not one but six tee pieces attached to the body, and trying to solder six loose parts to one other is more than a match for me! My method allows all parts to be held together firmly enough for them all to be soldered at one go without risk of them moving out of alignment.
It’s useful to make up some special small toolmaker’s clamps from mild steel bar 1/4″ – 3/8″ section for other jobs, they don’t have to be precision made as they will soon rust with the heat and flux and probably won’t be much use for anything else. In fact, a light coating of rust helps stop the clamp being soldered to the work. Further on that theme, if it’s necessary to keep solder off some part of a fitment, perhaps a valve face or a small bore hole, then you can coat the area with typist’s correction fluid (‘Tippex’), this will positively stop the solder sticking and it’s easy enough to clean off afterwards.

Related Content
induction brazing SS steel by handheld induction coil
induction melting silicon and steel
magnesium oxide acidic furnace for induction melting glass

induction preheating gas pipeline by full air cooled clamp induction coil and DSP induction heater

induction melting with Titanium alloy pot by customized induction coil

induction melting aluminium for casting wire wheel
induction heating steel plate by pancake induction coil

induction heating steel knife


Newest Comment
No Comment
Post Comment